Customers like to hear from their contractors often and staying on top of communication can be difficult—especially during a busy season when more jobs are happening simultaneously. Instead of always reaching for the phone or taking time out of your day to send emails with appointment reminders or updates, you can automate your communication methods to do work for you.
AccuLynx users have access to the Automation Manager, an automation messaging system that helps you communicate more efficiently with your teams and homeowners. While it might take a few minutes to set up the Automation Manager at first, you will be thankful for all the time you will save going forward. Here is a quick cheat sheet with tips on how to efficiently use the Automation Manager in AccuLynx, so you can more effectively communicate with your team and customers.
What is the AccuLynx Automation Manager?
The Automation Manager is a free feature in AccuLynx that can help you streamline communication with your teams and homeowners. With the Automation Manager, you can set up automated emails, texts, and tasks that are triggered based on events in AccuLynx. You can access the Automation Manager right from your AccuLynx dashboard by going to the dropdown list and clicking on “Automation Manager.”
How to Set Up an Automation
You can set up new automations by clicking on the “Add Automation” button on the top right corner of the Automation Manager page and creating a new name for your automation.

Creating a Trigger
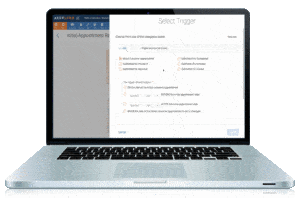
The first thing you need to do when setting up a new automation is to create a trigger— the event in AccuLynx that will launch the automation. There are four different types of triggers that are available to use in AccuLynx:
- Job Triggers — These triggers are based on a job action, such as creating a job or setting an appointment. For example, once you set an appointment with a homeowner, they would automatically receive a text to confirm the appointment.
- Milestone Triggers — These triggers are based on job milestones, such as moving a job from Prospect to Approved. This would be useful to alert the sales team about where a prospective customer is in the pipeline or what the status of a specific job is.
- Order Triggers — These triggers are associated with material ordering events, such as when an order is sent out or filled. An example of using this trigger would be to alert your team about different events surrounding materials, such as when an order is created, the status of the order, or when it is filled.
- Financial Triggers — If you use AccuFi in AccuLynx, you can set triggers for when AcciFi Financing status changes to offers, no offers, or funded. This is helpful so that you can automatically alert the customer or sales team when there is a change in status so that everyone can be on the same page.
After you identify the type of trigger you want to use, you will choose the defining event that occurs to set off the trigger and when the action will take place. For example, if the trigger is that an initial customer appointment is set, you can identify how close to the appointment date you would like to send a reminder.

Creating an Action
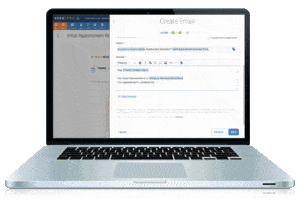
After you finish setting up your trigger, you will need to set up the action that the trigger will set off. In AccuLynx, there are a few different actions that can take place following a trigger:
- Send an Email — Automated emails are prewritten emails sent directly from AccuLynx to a specified contact. You can add personalization tags, like names, dates, and times, to ensure the email is populated with the correct information.
- Assign a Task — This action creates a task in AccuLynx and assigns it to one of your team members. Team members will be notified when they are assigned a task so they can get started right away. You can add additional information, like due dates, to this action as well.
- Send a Text Message — Automated text messages are sent directly from the AccuLynx job file using a unique local number. You can set up the recipient with dynamic tags, similar to an email action, and see a record of all the messages sent in the job file so you can keep track of what was said.
After you set the action, you have to turn on the automation by switching the status button from off to on. You can turn automations on and off whenever you want.
Different automation actions can help your roofing business streamline different aspects of your process. For example, you might send an email to request a review from a customer when their milestone status changes to Complete. You might assign a task to have your production manager schedule labor when an order is filled. Or you might send a text message to remind a customer of their upcoming appointment when it is scheduled in AccuLynx. These three actions in the Automation Manager allow you to customize your communications in a way that works best for your business.
Save time with the AccuLynx Automation Manager
Keeping everyone in the loop can be time-consuming, and by automating how you communicate with your team and customers, you will save hours over the course of your week. If you’re an AccuLynx customer, check out our support page for automations every company should have. Not an AccuLynx customer? You can learn more about automation and how AccuLynx can help your business save time and increase productivity in a short demo.


6 Comments. Leave new
I would like to know how to create a trigger that once an estimate or job value is updated, how can I trigger it on Zap? I only find one trigger that triggers to get a list of jobs
Hi Hassan – Please reach out to our support team for assistance. You can find them here: https://acculynx.com/support/
Can I send out a mass email to all customers who have been closed?
Hi Jim – you can use AccuLynx to set up an automation that emails customers when they close. But you’ll need to use an email marketing platform, like HubSpot, to send out a mass email to all past customers.
Is there a way to attach a smart doc requiring signature to an automation email?
Hi Mason,
Sorry for the delayed response. I spoke with our dev team and found out this function is not available in AccuLynx at this moment. It sounds like they’re hoping to make this possible in the future.