At AccuLynx, we’re always updating and improving our features to better serve you. Because we know that each roofing business is unique, a primary focus of ours has been providing the ability to customize features so they can help you run your business in a way that best fits your needs. With that said, AccuLynx is excited to present two updated features: the Workflow Manager and the Financial Worksheet!
AccuLynx Workflow Manager

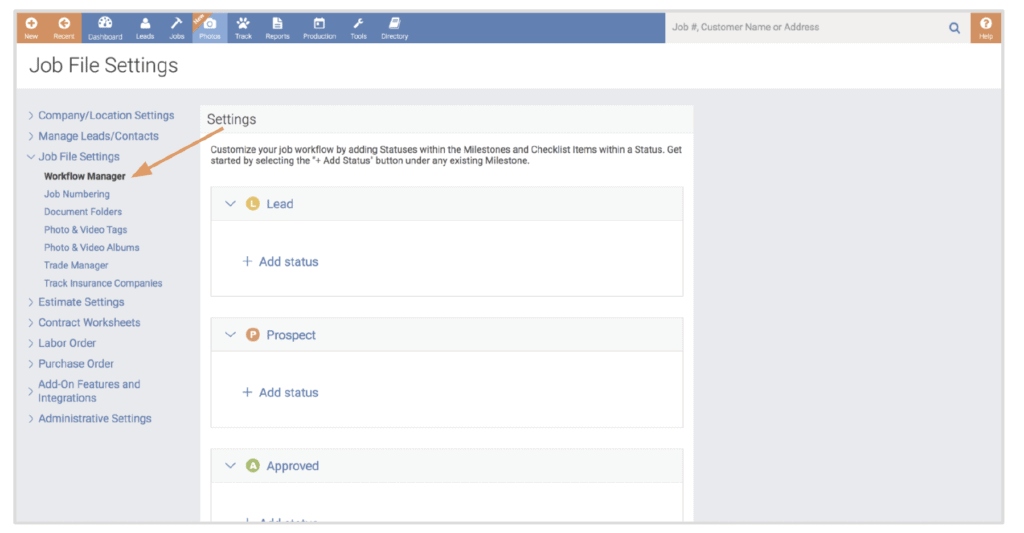
Now you can create customizable workflow statuses and checklists within your pipeline. Organize your business the way you want by building a series of step-by-step statuses under each milestone, see time-stamped actions, and get real-time notifications when a change is made, or your attention is required.
You can drill down even further by setting different statuses for your trades, categories and work types. You can also create customizable checklists for each status, so you know nothing will slip through the cracks.
Using the Workflow Manager

- Add a Status under any of the existing Milestones. Custom Milestone Status allows you to track each job with more detail than our current Milestones provide.
- Add Checklist Items to the Status. Under each Status, you can add custom Checklist Items to help manage and communicate the tasks needed for each job.
Updates to the Job File
Along with the customization option within the Workflow Manager, we also made some updates to the Job File so that it is easier to see the current Status of a job. The Next Steps panel at the top of the Job File Overview screen displays the current Status or Milestone of your job or lead.
Addition of the Progress View
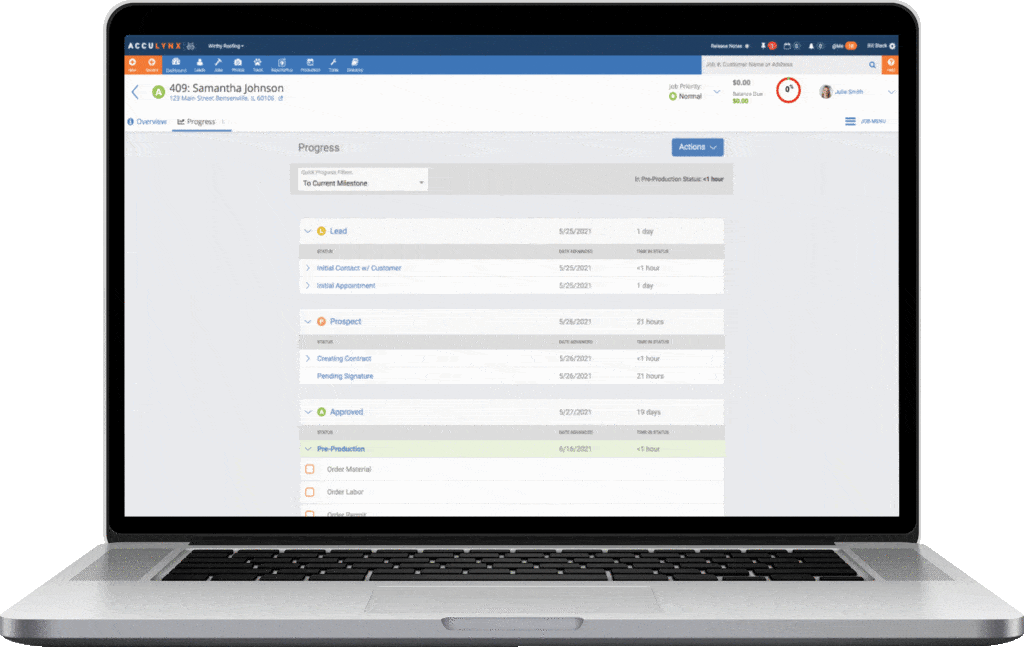
From the Job Menu in the Job File, we have added the Progress view to easily track the completion of each Milestone, Status, and Checklist Item. This will help you see all your jobs and how they are progressing in one centralized location.

In the Quick Progress Filters drop-down, you can also view more information concerning each Milestone and Status, including when the job was entered, when a Checklist Item was completed, and who completed the Checklist Item. Only users with the correct permissions can advance a job to the next Milestone. This can help you stay on top of your team by knowing who has done what and when.
Introducing New Financial Worksheets

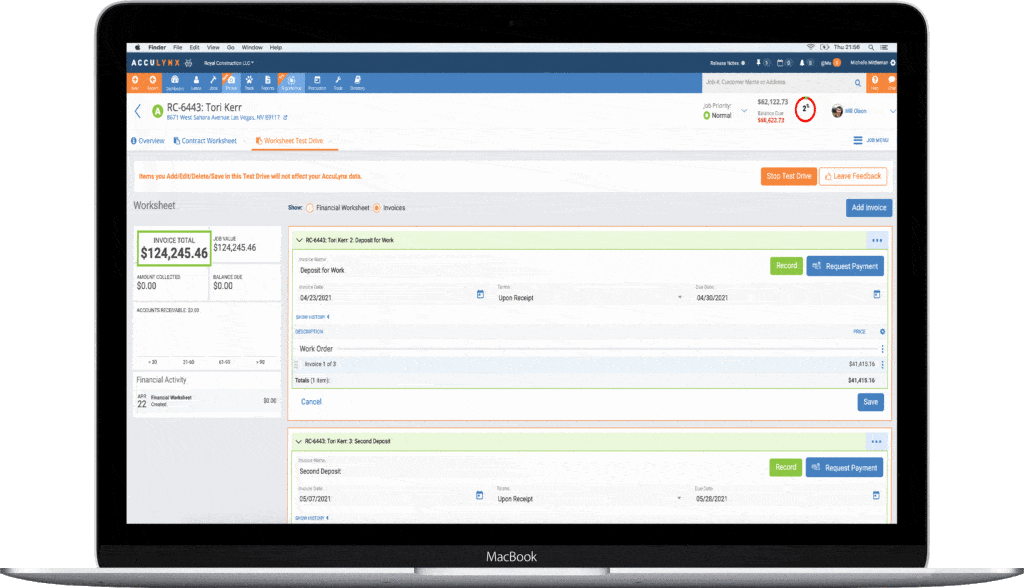
When you land on the Financial Worksheet page in your Job File, it will automatically populate details from your estimate. If the job does not have an estimate, you add details quickly in the empty worksheet.
The Financial Worksheet will take the place of the Contact Worksheet for new AccuLynx customers. However, current customers can still use the Contact Worksheet by clicking “Switch to Old Contract Worksheet” on the Worksheet Tab. It is good to note that you can’t return to the Contact Worksheet once the Financial worksheet is turned on.
That said, there are a lot of benefits to this new redesign, including:
- Customize your contact sections and add or amend sections. To edit what you want on the worksheet, click on the column settings or gear menu and choose what details you would like displayed.
- Customize your invoices. From the Financial Worksheet, you can quickly move to the Invoice Worksheet to bill your customers. All the items from your Financial Worksheet can be added to the invoice. Here, you can still edit, reorder, or change items on the worksheet by clicking into each section and making your changes.
- Track your payments in real-time. After you send out your invoice, your accounts receivable will start aging, and you can track this on the left half corner of every worksheet. Once the payment is received, you can mark the invoice as paid to stop the aging process.

Have questions?
If you need help, contact your Customer Success Manager or reach out to AccuLynx Support.
Email: support@acculynx.com
Call: 608-473-3800


4 Comments. Leave new
If a customer pay only a portion of the invoice, how can we set it up so that the payment is applied to the total due, so we can re-send the invoice that shows both the payment then balance due without creating additional invoices (this way the approved job value matches the invoice amount) ?
Hi Kori – Go ahead and reach out to our support team. They’ll be able to walk you through these steps. You can contact them here: https://acculynx.com/support/.
How can i make a predetermined checklist show up on evey labor order that is interactive.
Hi Travis – Please reach out to our customer support team and they can show you how to do this! You can reach them here: https://acculynx.com/support/